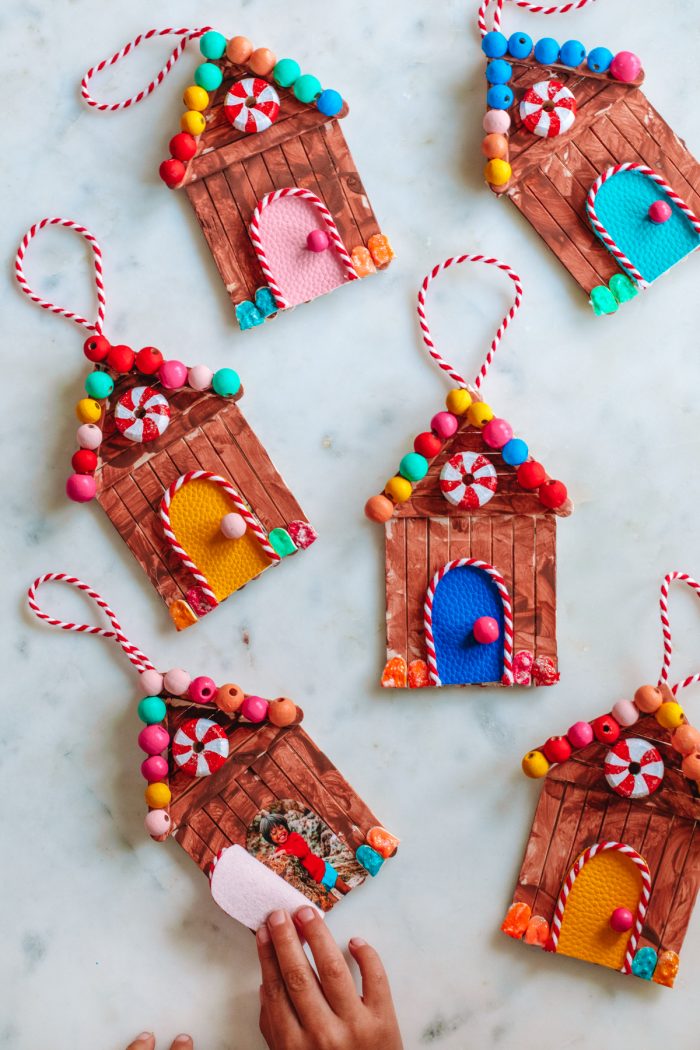
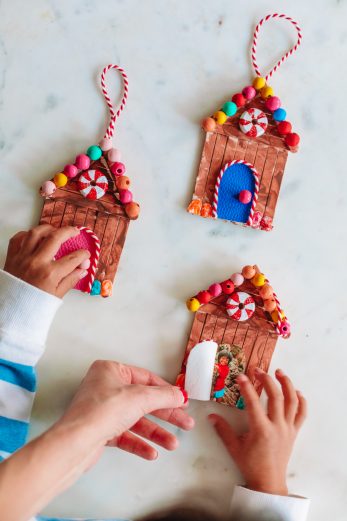
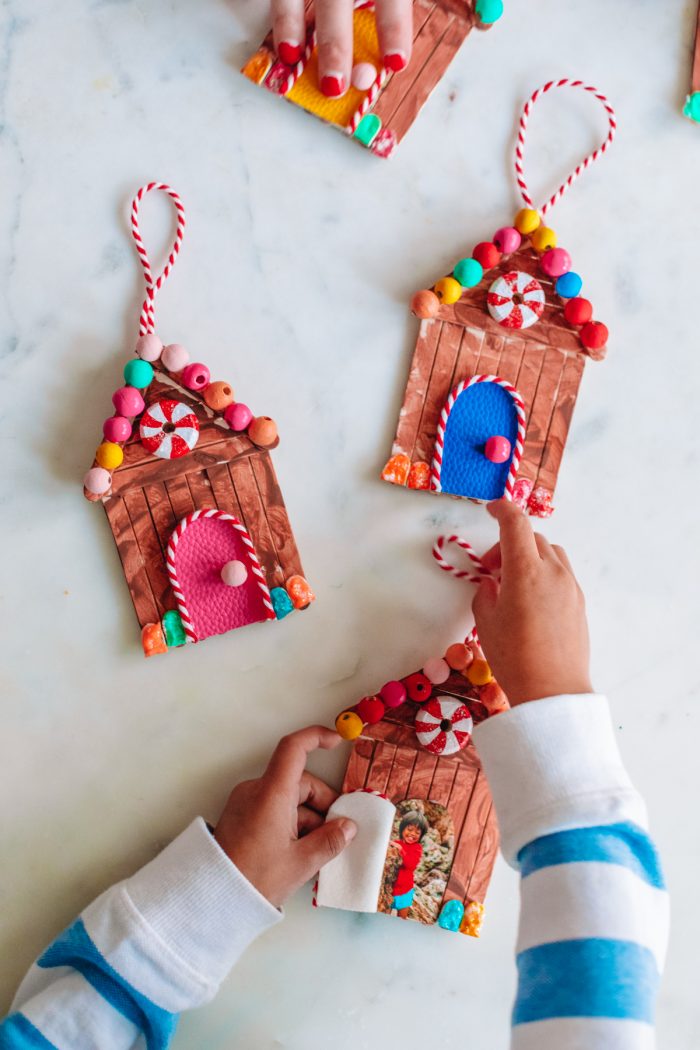
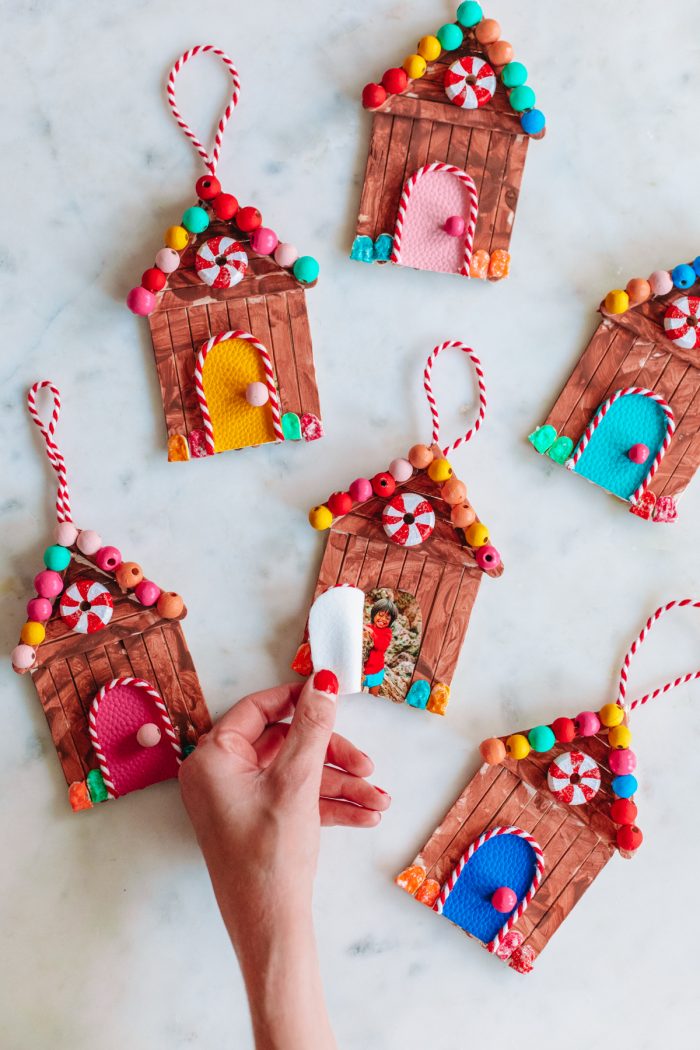
We’ve started doing what I call “Ornament Grams” every year from our son to close family members because I love nothing more than a homemade ornament. Especially popsicle stick ornaments and ones that involve a picture in it!! These DIY popsicle stick gingerbread house ornaments accomplish both, with a cute picture hiding behind the door!!
You can adjust this project to fit any age. For the littlest ones, have them paint the houses, then you can add the decorations. For older kiddos, they can paint, get creative making decorations and decorating the whole thing themselves!
We landed somewhere in-between with our 3 year old who loves to paint and glue, and we both had a blast! Keep reading for the full tutorial!
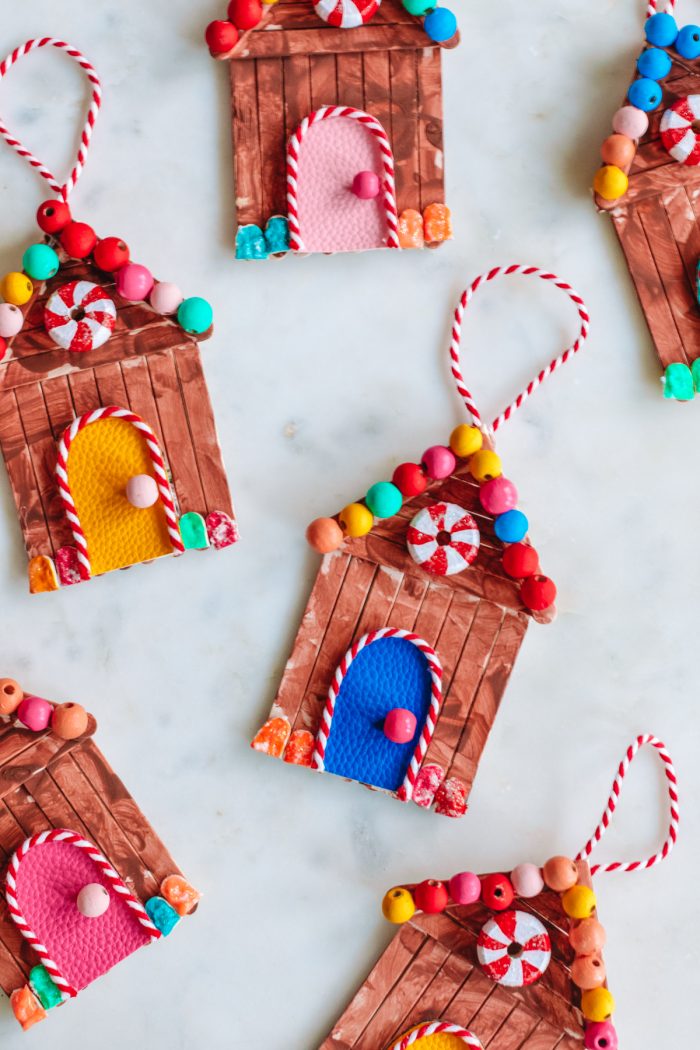
Supplies You’ll Need
I like this project because, aside from the key “ingredient” of popsicle sticks, the other supplies can be so flexible. I didn’t buy anything for this project, just used random craft supplies I had leftover from other projects to decorate. I encourage you to get creative and do the same with your little ones!
Here’s what we used:
- Popsicle Sticks
- Wallet-sized photo
- Wooden beads (I had a combo of plain ones I painted and others that were already colorful!)
- Wooden discs (For the peppermints!)
- Puffy paint (For the gumdrops)
- Glitter
- Faux leather scraps (For the doors. This could easily be replaced with foam, felt or fabric!)
- Red & white twine
- Brown, red, white & various rainbow hued paints
- Mod Podge
- Strong non-toxic glue
- Hot glue (You don’t need to use all 3 glues, but I always have hot glue on hand and use it because it dries so fast!)
Assembling Popsicle Stick Gingerbread Houses
Here’s how to assemble the popsicle stick gingerbread houses:
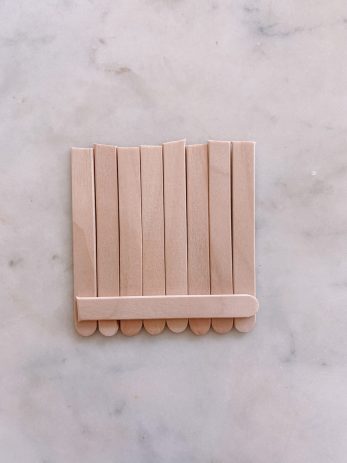
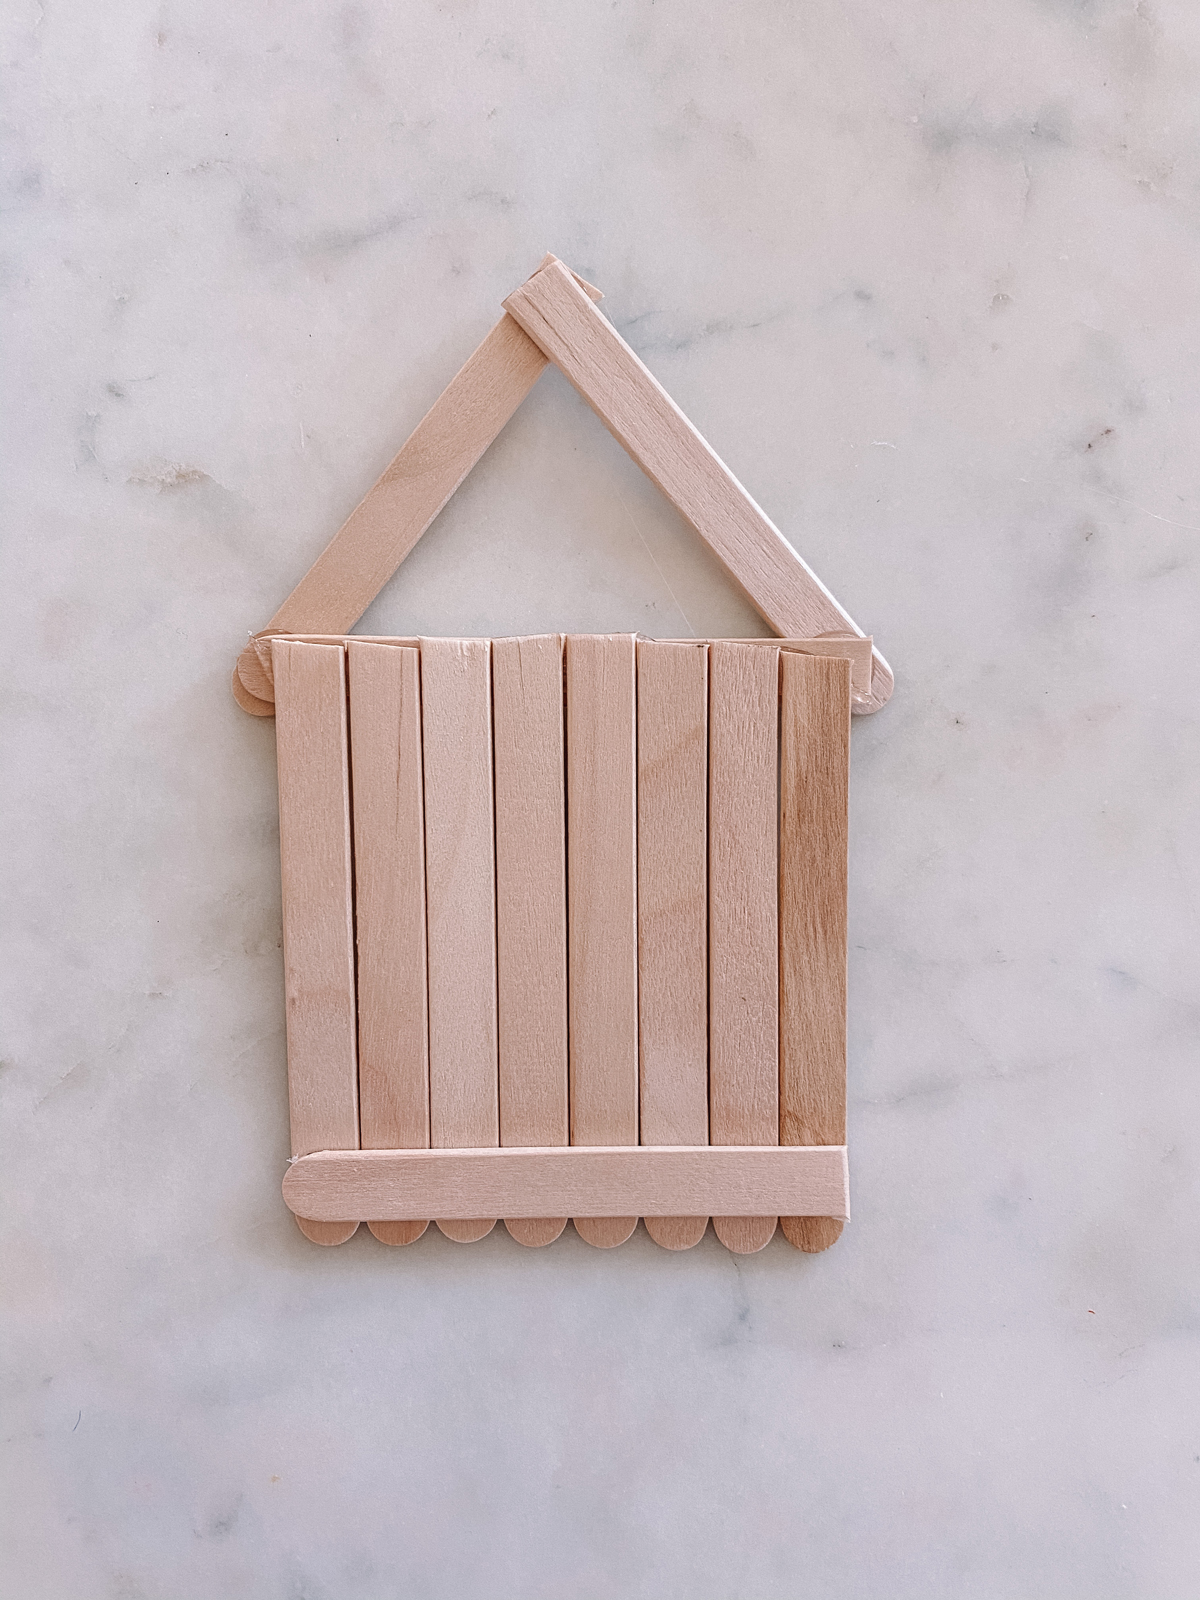
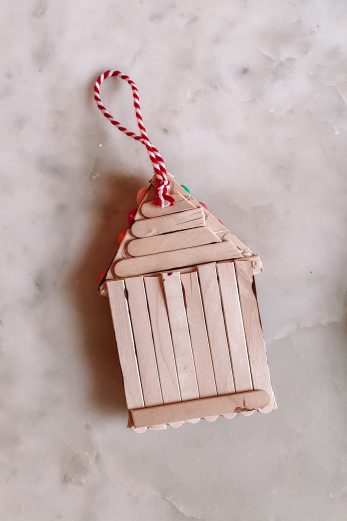
1. You’ll need eight popsicle sticks to create the base of the house. I trimmed mine to be about 2/3 of the original length, but you can make them whatever length you choose! Be sure to save the trimmings if you want to make gumdrops like I did. (Tutorial below.)
2. Line up the eight popsicle sticks and glue another popsicle stick horizontally across the bottom to glue them all together. (You’ll have to trim the popsicle stick so that it fits accordingly across the back of them!) I used hot glue for this, but you could use any strong glue.
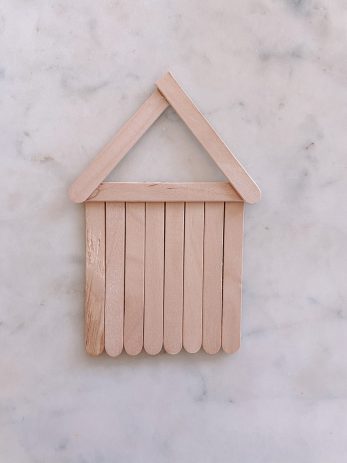
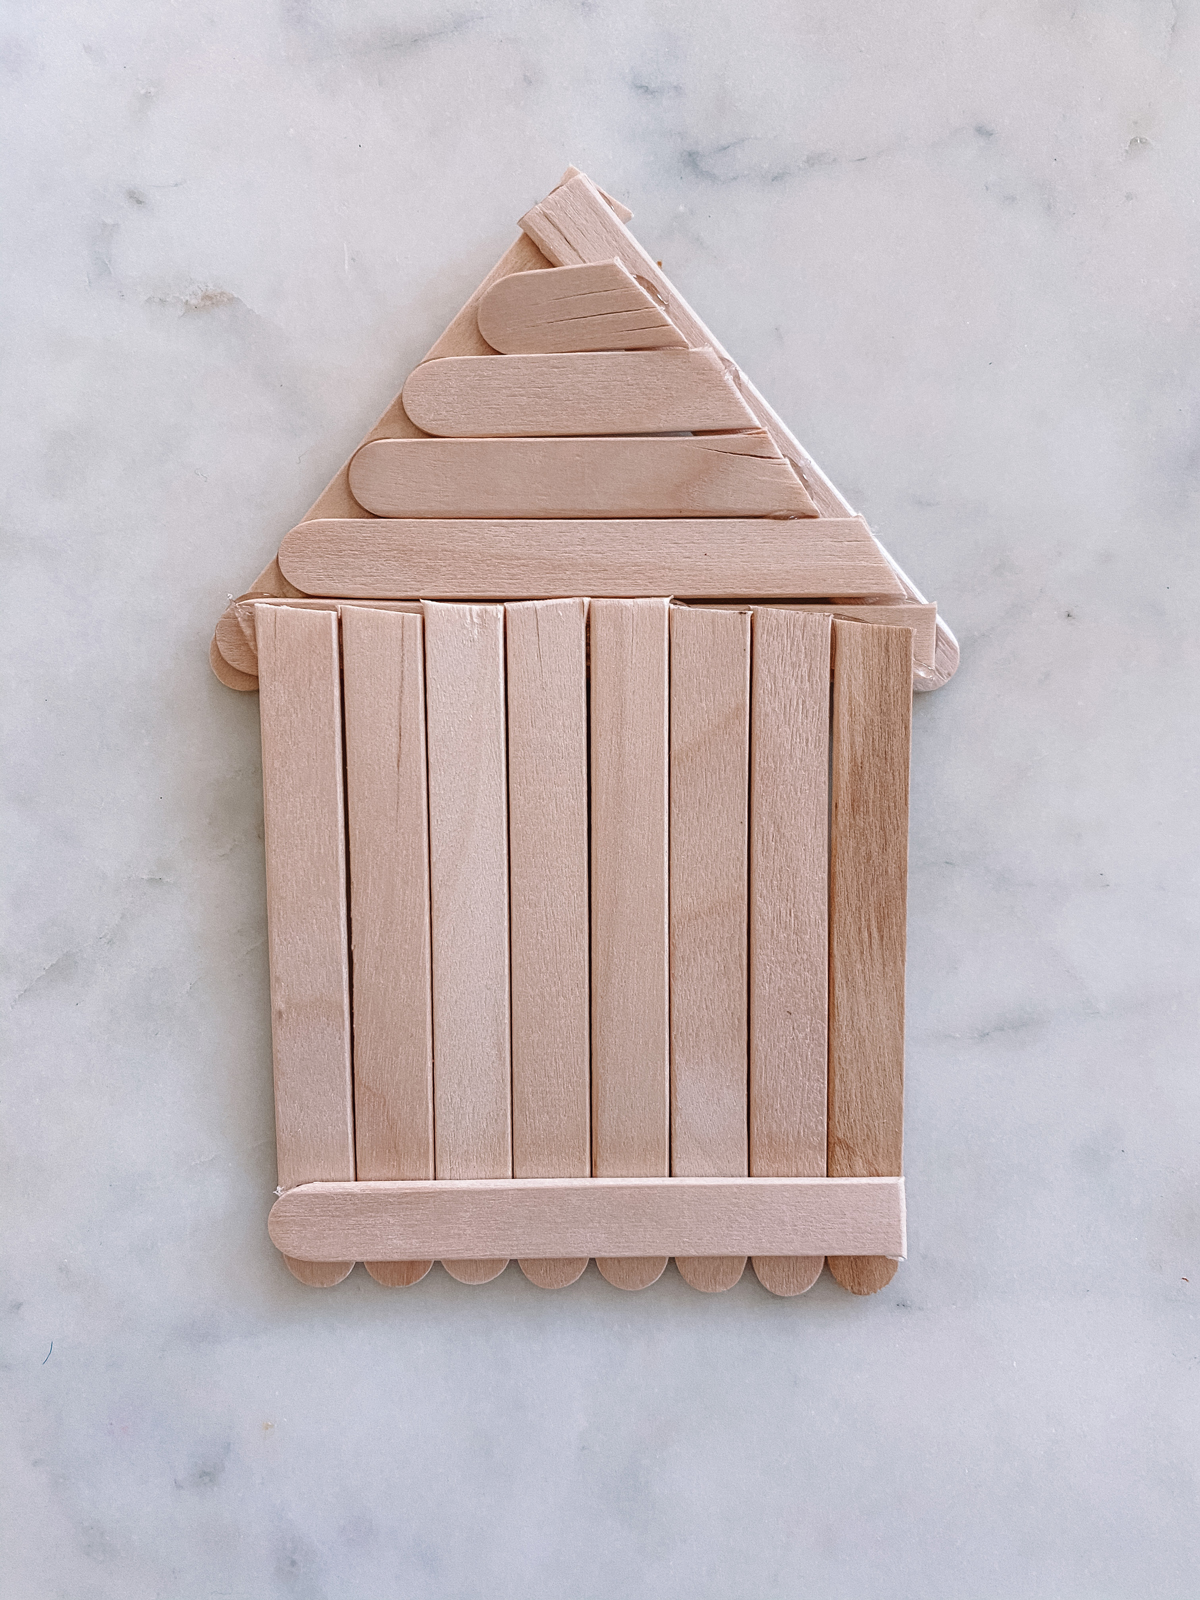
3. Flip the piece over and glue another popsicle stick across, this time along the top.
4. Glue two popsicle sticks to the top, forming a triangle. Again, you’ll want to trim these based on how tall you want the roof to be!
5. Flip the piece back over and fill in the space of the triangle by gluing popsicle sticks horizontally across. This is a great way to use up some of the scrap pieces you trimmed off of the other popsicle sticks! Now you’re ready to paint!
How To Make the “Candy” Decorations
Here are a few candy decorations we used, but there are endless possibilities for this part! Be sure to adjust the candy types based on your child and their age to ensure you’re using items that are safe for them!
Here are a few DIY faux candy ideas to make for your gingerbread house ornaments:
– Peppermints: I used round disk beads that we already had. Painted a red and white swirl and let dry.
Then I added iridescent glitter. To do so, I mixed some glitter with mod podge and painted it over the whole thing. Helps the glitter stay on better!
– Gumballs: If you have or can find already colorful beads, that makes this super easy. But if you have plain wooden beads or spheres, you can paint them any color you want!
To paint the beads, I slid a bunch onto a bamboo skewer to make it easier to paint them all at once. Then slid them off carefully and let them dry.
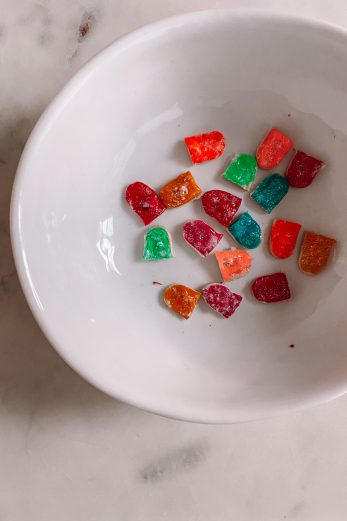
– Gumdrops: Grab the trimmings from your other popsicle sticks and use those for this part. Cover the small end pieces with puffy paint to give them some texture. Let dry.
Then paint with a iridescent glitter/mod podge mixture and let dry again. Trim down to size.
Note: Some may crack slightly on the back when cutting, but the puffy paint should hold them together and you’ll never know once they’re glued onto the houses!)
Decorating the Gingerbread House Ornaments
To decorate your popsicle stick gingerbread house ornaments:
1. Paint the house brown and let dry.
2. Decide what size/shape you want the door to be and cut out a template.
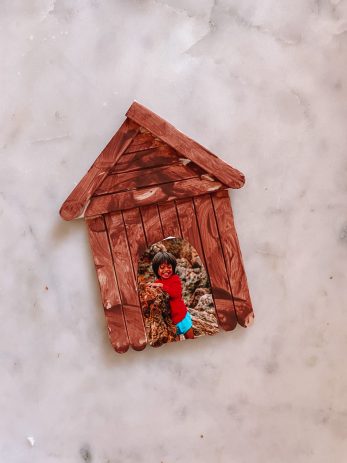
3. Use the template to cut out your photo as desired.
4. Glue the photo to the bottom center of the gingerbread house.
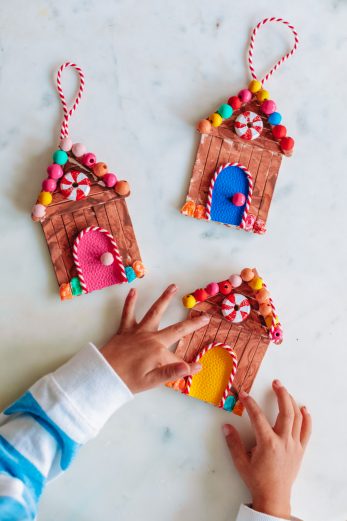
5. Decorate with the candies you created. For our 3 year old, I put the dots of glue on the pieces and then he glued them onto the house! Adjust accordingly depending on age.
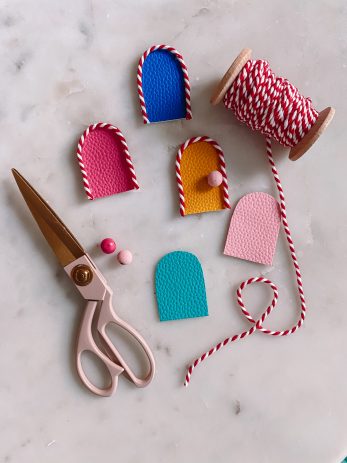
6. Cut out a door from the material of your choosing using the same template you used for the photo.
7. Add trim to the door if desired. I added a red & white twine border and a bead for a door knob.
8. Run glue along the back left side of the door and glue along the left edge of the photo.
9. Add a loop of twine or ribbon to the back of the top of the house for hanging.
If you aren’t into ornaments, you could easily turn this into a magnet instead but adding a magnet to the back instead of a loop for hanging!
Photos by Jeff Mindell
More Ornament Ideas
- Christmas Window Popsicle Stick Ornament Craft
- DIY Rudolph Ornaments
- My Favorite Ornament Exchange & Tradition Ideas
Hope these popsicle stick gingerbread house ornaments inspire you if you’re looking for an ornament project to do with your kids!! I’m so happy with how they turned out, and extra glad I had him make an extra one for us to keep. 😉
Don’t forget to date the back of any and every homemade ornament you make, you’ll thank yourself later!!!
p.s. Here’s more Christmas ornaments to make and buy!
Popsicle Stick Gingerbread House Ornaments
Materials
- Popsicle sticks
- Wallet-sized photo
- Wooden beads
- Wooden discs
- Puffy paint
- Glitter
- Faux leather, foam, felt or fabric (for the door)
- Red & white twine
- Brown, red, white, various rainbow color paint
- Mod Podge
- Strong non-toxic glue
- Hot glue (You could use the strong glue for this whole project, but I always like to use hot glue to speed things up!)
Instructions
To construct the gingerbread house:
- You’ll need eight popsicle sticks to create the base of the house. I trimmed mine to be about 2/3 of the original length, but you can make them whatever length you choose! Be sure to save the trimmings if you want to make gumdrops like I did.
- Line up the eight popsicle sticks and glue another popsicle stick horizontally across the bottom to glue them all together. (You’ll have to trim the popsicle stick so that it fits accordingly across the back of them!) I used hot glue for this, but you could use any strong glue.
- Flip the piece over and glue another popsicle stick across, this time along the top.
- Glue two popsicle sticks to the top, forming a triangle. Again, you’ll want to trim these based on how tall you want the roof to be!
- Flip the piece back over and fill in the space of the triangle by gluing popsicle sticks horizontally across. This is a great way to use up some of the scrap pieces you trimmed off of the other popsicle sticks! Now you’re ready to paint!
To make the "candy" decorations:
- Peppermints: I used round disk beads that we already had. Painted a red and white swirl and let dry. Then I added iridescent glitter. To do so, I mixed some glitter with mod podge and painted it over the whole thing. Helps the glitter stay on better!
- Gumballs: If you have or can find already colorful beads, that makes this super easy. But if you have plain wooden beads or spheres, you can paint them any color you want! To paint the beads, I slid a bunch onto a bamboo skewer to make it easier to paint them all at once. Then slid them off carefully and let them dry.
- Gumdrops: Grab the trimmings from your other popsicle sticks and use those for this part. Cover the small end pieces with puffy paint to give them some texture. Let dry. Then paint with a iridescent glitter/mod podge mixture and let dry again. Trim down to size. Note: Some may crack slightly on the back when cutting, but the puffy paint should hold them together and you’ll never know once they’re glued onto the houses!)
To decorate the gingerbread house:
- Paint the house brown and let dry.
- Decide what size/shape you want the door to be and cut out a template.
- Use the template to cut out your photo as desired.
- Glue the photo to the bottom center of the gingerbread house.
- Decorate with the candies you created. For our 3 year old, I put the dots of glue on the pieces and then he glued them onto the house! Adjust accordingly depending on age.
- Cut out a door from the material of your choosing using the same template you used for the photo.
- Add trim to the door if desired. I added a red & white twine border and a bead for a door knob.
- Run glue along the back left side of the door and glue along the left edge of the photo.
- Glue a loop of twine or ribbon to the back of the top of the house for hanging.







Heather says
These are SO CUTE!
Kelly says
Thanks Heather!!!
Mia G says
Okay these are my new favorite homemade ornaments!!!
Barbara says
These are so cute, I want to start making them with my grandchildren right away! I was curious as to what you used to trim the wooden popsicle sticks for this project?
Annabelle Derowitsch says
Adorable. You come up with some amazing stuff! Thank you so much!
Marjorie says
Love, love, love these! We spent less than $5 as we had most of our supplies on hand, and were able to make 8 ornaments for family. Thanks for such a cute idea. We make a new homemade ornament every Christmas, no idea how we will top this next year.
kubet says
Best flight ever !
Charice Bomar says
Thanks I have these items ;Enjoyable DIY ;Crafty; Fun for ALL . Simply WONDERFUL.