A few weeks ago, I did a story on @shopstudiody sharing all about the sampling process we have for our clutches. You guys loved it and I’m so glad! (p.s. If you missed it, we made it a “highlight” on our account so if you go to the @shopstudiody profile, you can watch it right under the bio!) I always think it’s really fun to see the “Making of” process for products (Hellooooo anybody watch Unwrapped!?) so we’re going to try to start sharing more content like that starting…. today!
We started working on a cactus clutch shortly after we launched Can’t Clutch This. SOOOO many of you had requested it in a survey we did and various comments and we KNEW we had to make it happen. It ended up going through a lot of designs and re-designs to get it just right so it seemed like the perfect clutch to show you a step-by-step process of how it came to be. Ready!?
Every clutch starts with the inspiration phase. Usually we’re starting without an idea so we do a big brainstorm/brain dump of trends, colors, patterns, etc. But for this one, we already knew what we wanted the “theme” to be, so the process looked a little different. We were mostly concerned with how we were going to do a cactus clutch. Was it going to be a pattern like our taco clutch? We quickly decided this didn’t feel right for us. Because cacti are so detailed we were afraid a pattern of them would end up looking super busy.
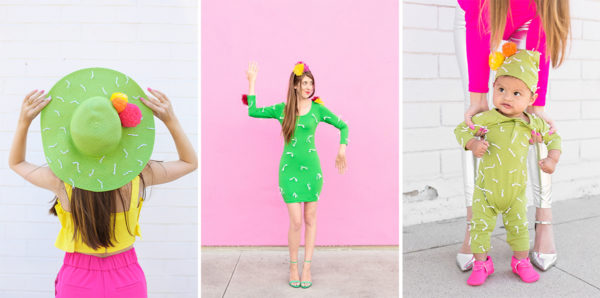
So I started looking back through the blog at our cactus projects like the costume and the floppy hat and thought “Maybe we can make the clutch actually look like a cactus?” I loved the idea of it having spikes and then some sort of keychain that represented a “flower.”
Once we have a concept, our design team likes us to come to them with our “dream” clutch and from there, we design and start pricing out what will actually work within our budget. I told them I wanted to do a green circle (!) shaped clutch with three dimensional spikes and a pom pom keychain, inspired by the DIYs we had done. At that point, I’ll also give them all my pantone color selects.
Unlike the DIYs we’d done where we used yarn as the spikes, we couldn’t do that on a clutch because it wouldn’t hold up to the wear and tear that a bag goes through. So we decided to try stitching small pieces of white leather and sent this note along as well.
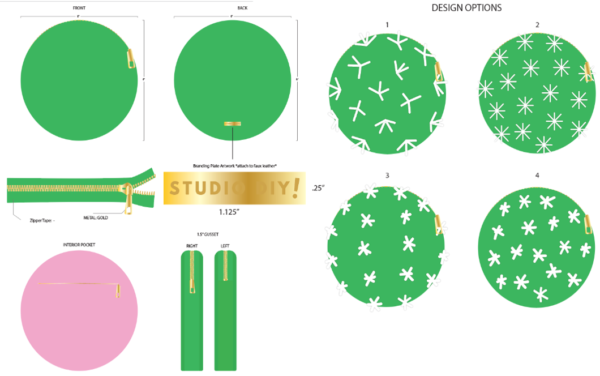
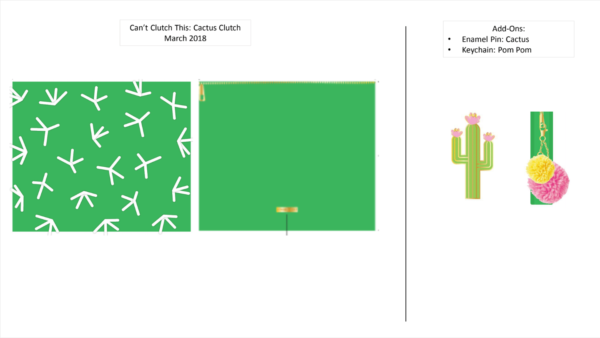
With all of that information, our designer does their first round of digital mock-ups and sends over for feedback. That’s what you see above! They’ll outline the size, placement of things like zipper and our nameplate and then give us a few design options to jump off of.
We chose option A, as that felt most like natural, not perfect spikes. With that selection made, they went to our vendor to get some pricing worked out and quickly let us know that with all the detail a cactus would require, we could not do a circle shape for this clutch. (HINT HINT HINT)
Since Can’t Clutch This is a subscription model, we don’t have the option to adjust the price per clutch, which means we have to constantly get creative to make design or shape adjustments based on the other features of each clutch. I actually find it really fun, like a puzzle, to see how we can adjust our vision to work within certain limits.
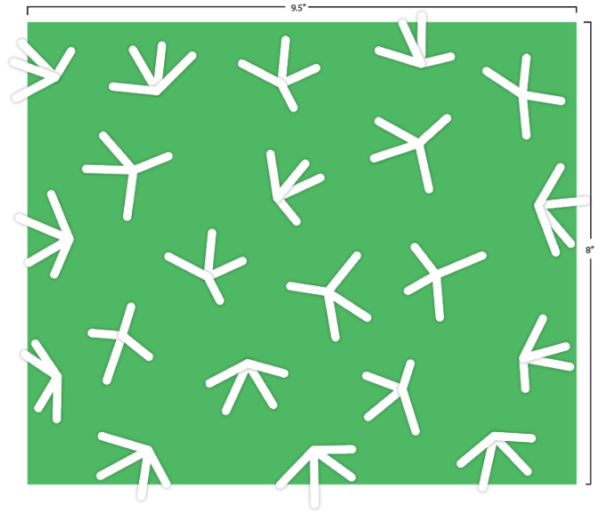
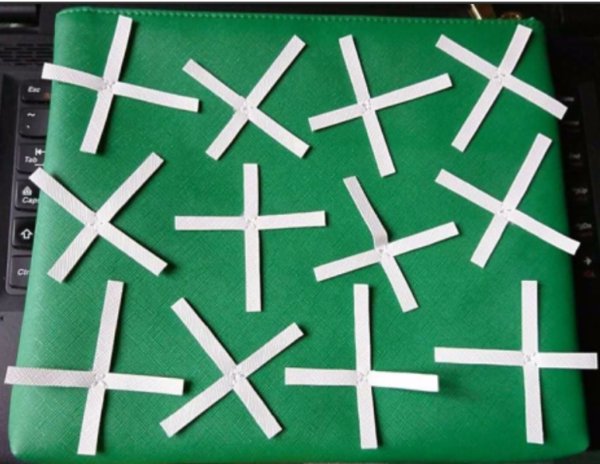
We decided to go with our most popular shape, which is almost a square, so we could maximize our cactus spike space and went ahead with a sample. Wait for it…
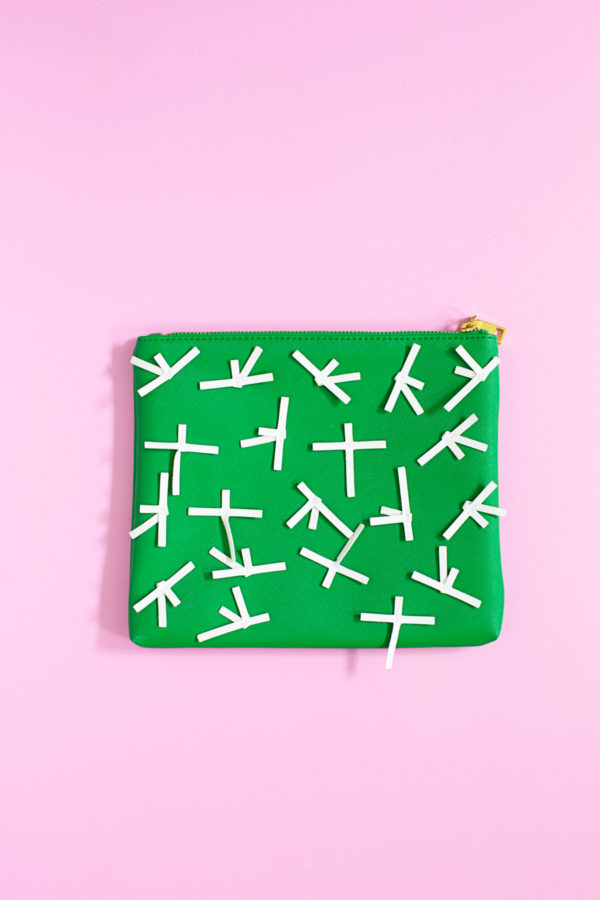
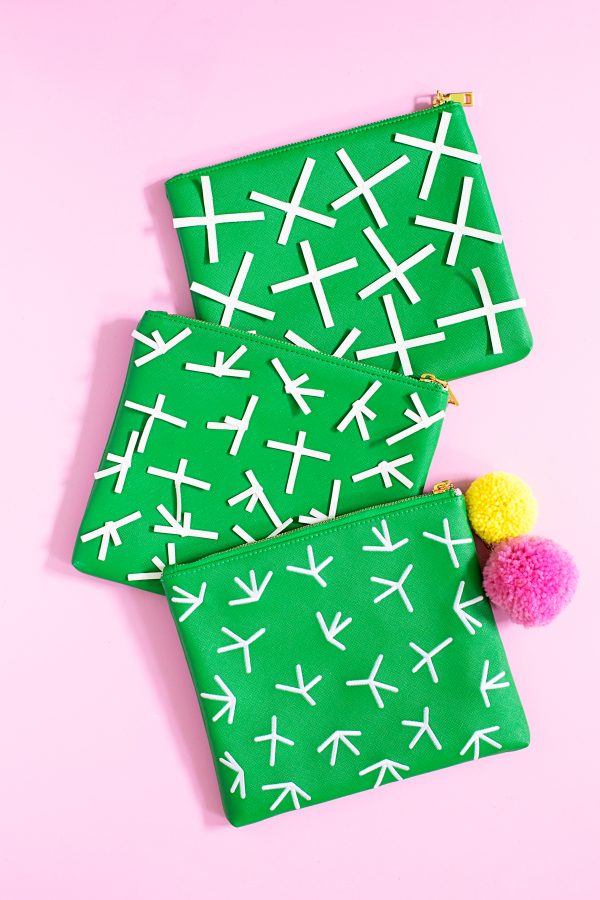
HAHAAHAHA! The above is what came back. As I mentioned in the Instagram story, every clutch is open to a little creative interpretation by the manufacturer who is working within their own equipment limits. This was obviously not going to work but I was so determined to make it happen that I started troubleshooting.
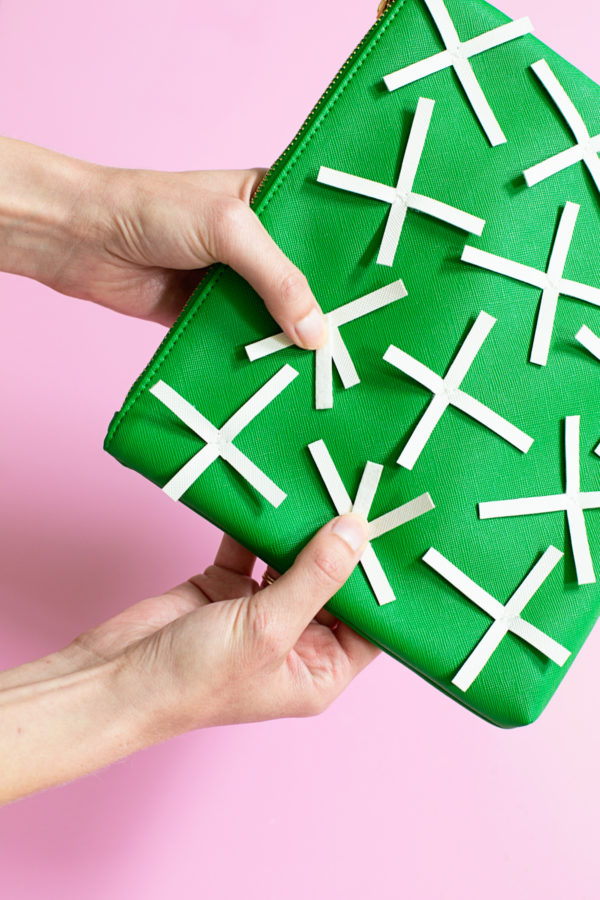
I used glue dots to glue down some of the spikes so they were less uniform and thought that maybe if they were smaller and more organic, it would read more “cactus.” We sent pictures of my new “mock up” to the manufacturer and got the below back.
Better but still just not reading. In fact, one of the members of our team thought that it was a mock-up we had made not the actual thing. Ha!! Not good. So we decided to look into other options for getting the spikes without perhaps the 3D factor.
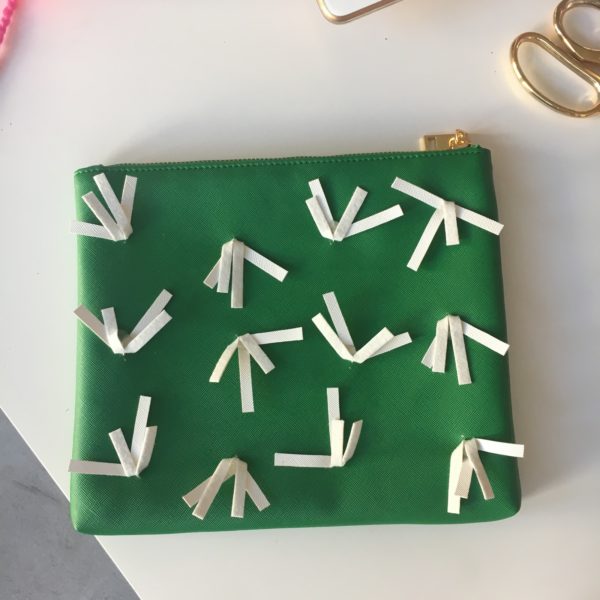
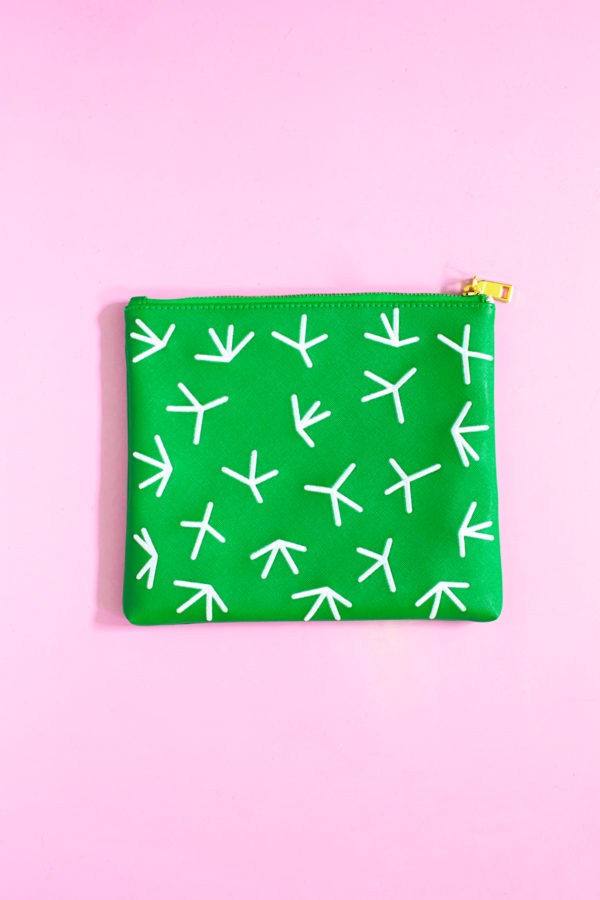
Since our embroidered bags are some of our most popular, we tried out an embroidered version. With that, we knew we could really control the placement of each spike so it didn’t feel super uniform or patterned, and frankly after seeing the 3D mock-ups, we knew it would hold up better to wear and tear.
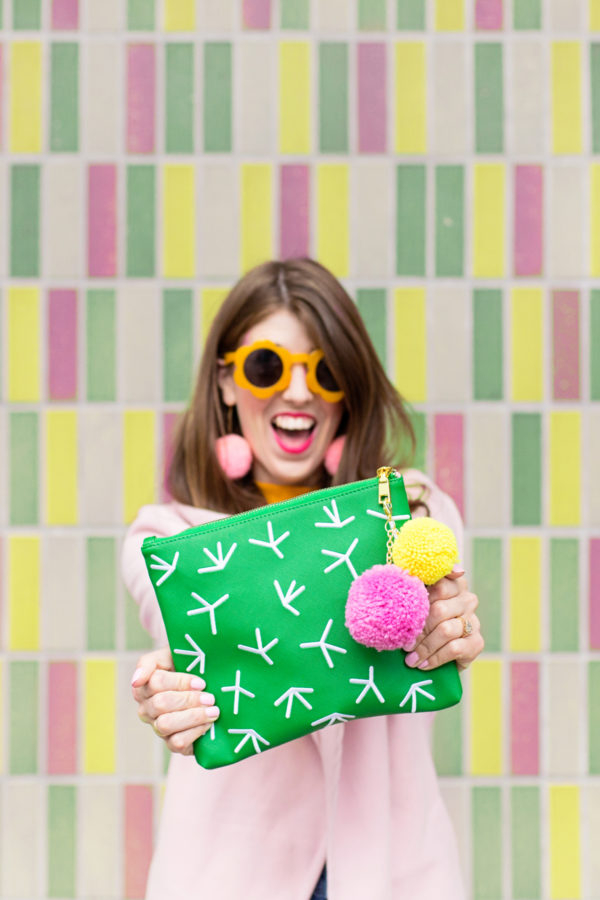
And this is what we received! The final clutch! We were really happy with how this looked, it felt clean and finished but still had the cactus feel since each spike was different. I’m really happy with how it turned out! Sure, it would be easier to just go with something we know works (embroidery) from the start, but it’s really important for us to explore new and different options, even if they don’t work out.
Photos by Jeff Mindell
So that’s that! What do you guys think?? Do you like learning about the process behind our clutches?? I hope so! As someone who had never done any product work before the launch of this, it’s been so eye opening learning about costs, limits, manufacturing and everything that goes into making every single product we consume each day.
If you want to join the Can’t Clutch This party, you can subscribe right here!!! So excited to see so many new pals with the launch of this clutch. I’m glad the wait was worth it!!!!


Mia says
This is awesome! I love seeing the process of how you guys make the clutches! Will you be doing this for all the new clutches?
Kelly says
Not all of them but definitely for a couple of ’em! Sometimes we get it right on the very first try (like with the Funday clutch) so it’s not AS interesting but will totally share any other ones that have to go through a lot of revisions!
Mia says
Awesome! I’m looking forward to it!
Elizabeth says
Love seeing the process!
Shantel says
This post is awesome. It’s really cool to see the process of the clutch designs.
Michelle says
It’s so interesting to see the process behind the clutch! I would love to see this for some more clutches as well!
https://www.makeandmess.com/
les says
LOVE this behind the scenes!!!
please make more clutches this size!!!
i have several of them and i bought the Funday one because *heart eyes emoji* but ultimately went back to the sprinkle one because of the size.
it fits everything without me having to maneuver everything to fit.
i still love it but ultimately, this sizing has worked the best! (of course everyone has their own preference) but this one! ahH! <3
i cant wait to see what else you guys come out with!!!
Kelly says
Good to know you like this size!! Thank you for the feedback, Les!!
Karen says
This is my fav size too!!
Allie says
I love seeing the process! I hope we get this for future clutches as well! It’s so cool to see the creative process. What do you do with the samples you get? I’d love to see if you’re re-purposing them somewhere else or just have a pile stacked up!
Kelly says
Good Q! We are putting together a new storage system for samples at the new studio but in the past we’ve had a drawer for each clutch and kept all the samples with it so we could refer to them as needed!
Kasia says
YAS GIRL! YAAASSSS! Thats the series I wanted on your blog! Behind the scenes are the best! Keep going! Looking forward for next reveals of “how we managed to bring you the best clutch we can!”!!! Cant wait to see the proces of future bags and have nothing against to see one more time the proces of making past clutches too. Instastories are cool (I remember when you do it first time with “girl power” clutch. It was so entertaining and fun. It was something new and wery interesting and educative for those of us whu had no ide how it is to create and produce sth!) but on the blog it’s more permanent 🙂
Kelly says
So glad to hear that!! Agree that it’s fun to have it on the blog where it feels more permanent. Will definitely share more in the future!!
Kristina B says
This was so fun! I LOVE seeing the first attempts at making the clutch! It’s like a Craft Fail with a happy ending! HA! And an upcoming circle clutch sounds SOOOO EXCITINGGGGG!
Alexandra says
I love the behind the scenes posts and I was also OBSESSED with Unwrapped! Now I want to go and rewatch every episode!
Kelly says
Dittooooo! The best show!!
Amy says
It’s really cool to see your thoughtful creative process! Plus, I LOVE the hints for what’s to come.
Barbara says
I looove the behind the scenes process! Please do it with all the future clutches. Also: how long in advance do you start the process of a new clutch? From the idea to the final one being approved?
Regina says
Seeing all the clutch process is so cool! Those stitched on white leather pieces are hilarious! Maybe I’ll jump back on the bandwagon next month because as much as I love a cactus theme those spikes just look a little funky to me (chicken feet?) Personally, I think design 3 or 4 would’ve been cuter. But I can see how this works well with your other cactus diys, so keep doing your thing girl! I do LOVE my poptart & emoji clutch and can’t wait to see what next months design is!
Heather says
I loved seeing this process!!! Super fun and the bag is so cute!
I have a q, is there an area to connect a skinny strap to make this sort of a cross body bag?
Claudia says
I wonder why circle is more expensive 🤔🤔
Jessica West says
I love it but wish you’d make more keychain options like previous clutches! I’m not a fan of enamel pins and miss all my adorable keychains! My faves were the toaster keychain, the avocado, and the ‘nope’ keychain! Not a fan of the pompoms or fuzzy ones, they get too dirty. <3